Unity Integration
Instructions for integrating with the Unity SDK
Marigold supports a Unity plugin that allows you to use the Marigold SDK for iOS and Android through a C# interface.
Installation
- Open you project in the Unity Editor.
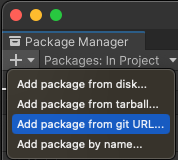
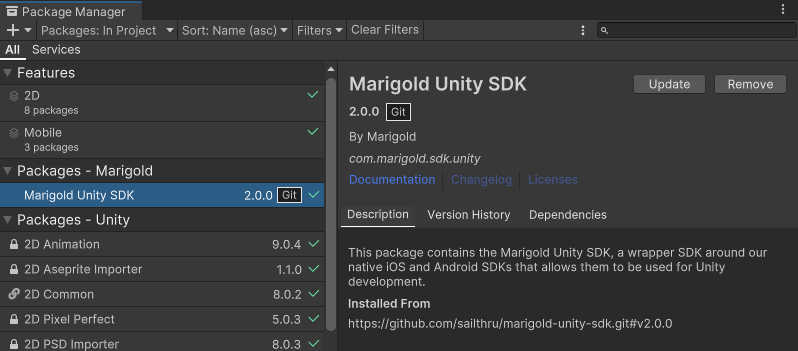
- Add the Marigold package using the Unity Package Manager:


- In the scenes you wish to include Marigold scripts, create objects with the Marigold.cs, MessageStream.cs and/or EngageBySailthru.cs scripts attached to them.
iOS Instructions
-
To generate your project for iOS, use the File menu to select Build Settings. Switch to the iOS platform and choose Build.
-
In the resulting Xcode project:
- Add the CoreLocation system framework.
- Add Marigold framework to the project using your preferred dependency management system. We support Swift Package Manager, Cocoapods and Carthage. For more details see our iOS Integration documentation.
- Create a
UnityAppControllersubclass (e.g.MyAppController.mm) inAssets->Plugins->iOSand add the MarigoldstartEnginecall to theapplication: didFinishLaunchingWithOptions:method. Unity will then automatically add this when generating the iOS build:
#import "UnityAppController.h" #import <Marigold/Marigold.h> @interface MyAppController : UnityAppController @end @implementation MyAppController - (BOOL)application:(UIApplication*)application didFinishLaunchingWithOptions:(NSDictionary*)launchOptions { NSError *error; [[Marigold new] startEngine:@"SDK_Key" withAuthorizationOption:MARPushAuthorizationOptionFull error:&error]; if (error) { throw error; } return [super application:application didFinishLaunchingWithOptions:launchOptions]; } @end IMPL_APP_CONTROLLER_SUBCLASS(MyAppController) -
Run your application.
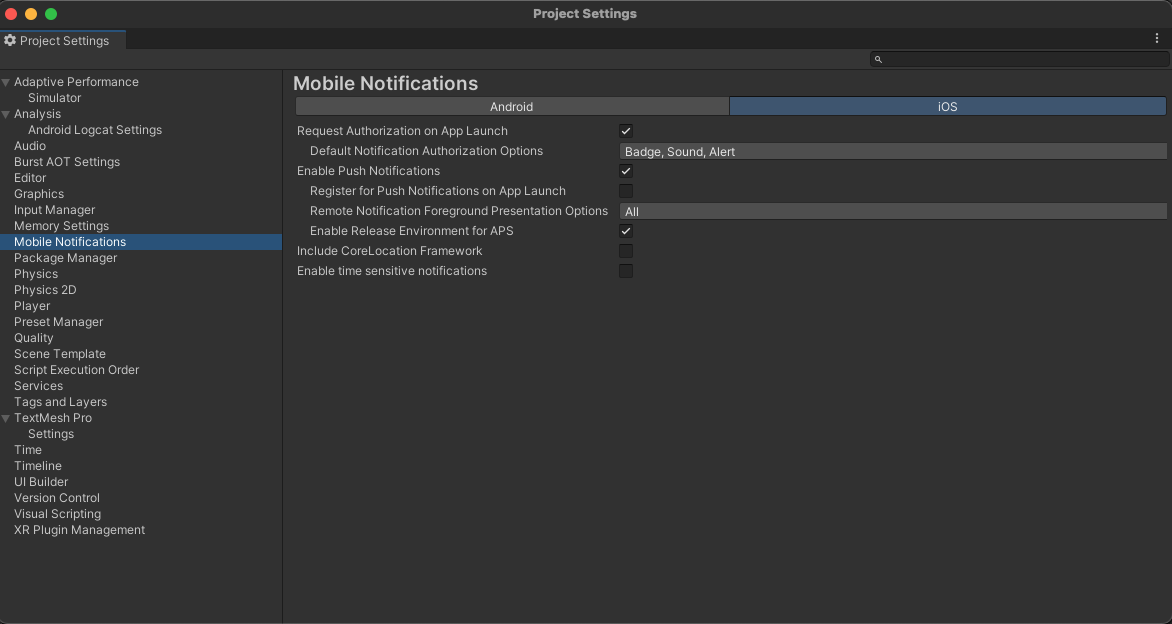
The next step is to Setup Push Notifications for iOS. Make sure to also Enable Push Notifications in Build Settings -> Player Settings... -> Mobile Notifications:

Android Instructions
- To generate your project for Android, use the File menu to select Build Settings. Switch to the iOS platform and check the Export Project option. This is required for the native side of the integration.

- Choose Export.
- Add the native Android SDK to the exported project. See Android Integration for more details. Make sure to add the Application class to the
launchermodule. - Add the following code to the Application class you created, in the
onCreatemethod after callingMarigold.startEngine:
// Override the default intent for notification handling. This is important to
// prevent duplicate opens when using combined push/in-app.
Intent intent = new Intent(getApplicationContext(), UnityPlayerActivity.class);
long requestCode = new Date().getTime();
NotificationConfig notificationConfig = new NotificationConfig();
notificationConfig.setDefaultContentIntent(intent, (int) requestCode, PendingIntent.FLAG_UPDATE_CURRENT);
new Marigold().setNotificationConfig(notificationConfig);
// Override the default intent for notification handling. This is important to
// prevent duplicate opens when using combined push/in-app.
val intent = Intent(applicationContext, UnityPlayerActivity::class.java)
val requestCode = Date().time.toInt()
Marigold().setNotificationConfig(NotificationConfig().apply {
setDefaultContentIntent(intent, requestCode, PendingIntent.FLAG_UPDATE_CURRENT)
})The next step is to Setup Push Notifications for Android
Initializing the Marigold SDK in Unity
When your app launches, you need to call the start method on the C# side. This should be called at least once, but can be called multiple times safely as it will no-op after the first call.
Marigold marigold = new Marigold();
marigold.Start();
Updated 3 months ago
